
How to Choose the Best Handheld Dot Peen Marking Machine?
Choosing a Handheld Dot Peen Marking Machine is less about finding the most powerful model and more about matching the tool to real work. A machine used beside a production line may need different features from one carried between repair benches. Think about the materials you mark, the available marking area, and how often the tool will be used. Steel tags, curved parts, and large frames each present different challenges. Small details matter.
Weight is only part of the decision. Check the grip, balance, cable arrangement, and controller layout. If the machine runs on a battery, ask how long it operates under typical marking conditions, not just in ideal tests. Also review the pin type, supported character sizes, marking depth controls, and file transfer options. Specifications can sound similar. A physical trial often reveals more.
Before comparing prices, prepare a sample part with the actual surface and marking content you expect to use. Inspect the result for legibility, spacing, and consistency. Ask the supplier about setup guidance, replacement pins, warranty coverage, and local service support. These practical questions can prevent downtime later. They are easy to overlook.
There is no single best choice for every workshop. A lighter tool may be easier to carry, yet less comfortable during repeated marks. A feature-rich controller may help with varied jobs, but add complexity. Be honest about your operators’ experience and daily workload. A checklist helps, but it cannot replace a test. Use the sections below to compare essential features and judge which compromises make sense for your application.
Define Your Marking Requirements and Operating Environment
How to Choose the Best Handheld Dot Peen Marking Machine?
Define Your Marking Requirements and Operating Environment
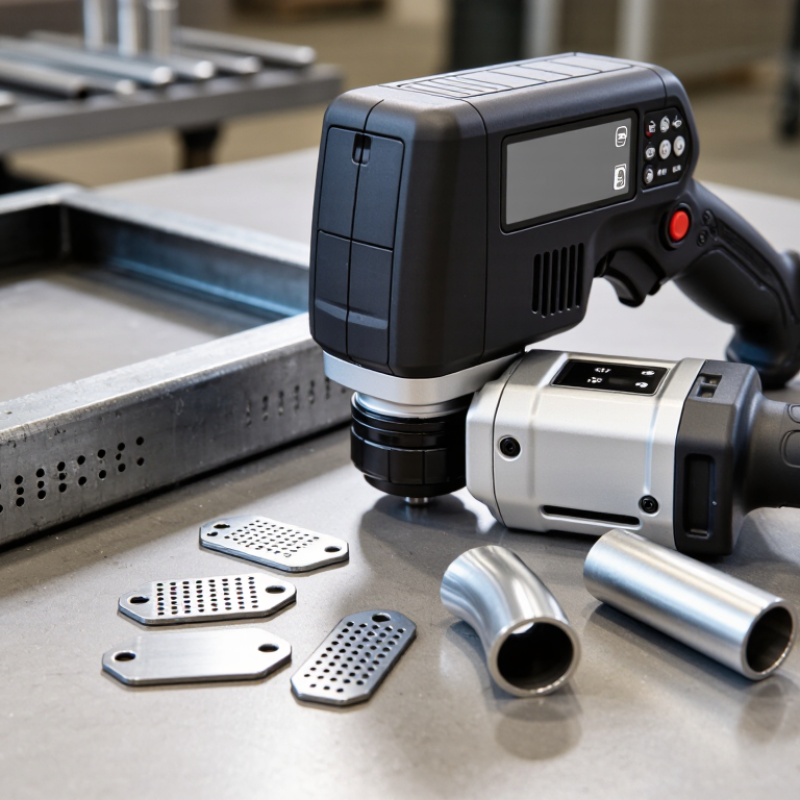
Start with the mark itself. List the material, surface shape, available marking area, and information to be engraved. Serial numbers on a flat steel plate need different settings from codes on a curved casting. Decide how deep and readable the marks must be, and how quickly operators need to work. Check sample parts when possible; material hardness, coatings, and surface finish can change the result.
Consider where the machine will operate. A bench-side tool may not suit a maintenance crew moving between large assemblies. Note the machine’s weight, grip, power source, cable reach, and access to the marking spot. Dust, oil, vibration, and poor lighting can affect setup and inspection. A requirement can look settled on paper, then shift when a real part arrives. That happens. Leave room for adjustment, but avoid paying for features your process will not use.
Tips: Test marks on a representative part before choosing settings. Inspect the smallest characters at the distance operators will use. Keep a few sample marks for comparison, and record the settings that produce clear, consistent results.
How to Choose the Best Handheld Dot Peen Marking Machine? — Define Your Marking Requirements and Operating Environment
| Requirement or Condition | What to Evaluate | Practical Selection Guidance | Why It Matters |
|---|---|---|---|
| Marking content | Determine whether the job requires serial numbers, dates, text, logos, 2D codes, or a combination. | Confirm that the controller can create and edit the required content. Test the smallest characters and codes on the actual part before purchase. | Character size, layout, and code readability depend on the marking head, software, material, and surface condition. |
| Marking area | Measure the largest area that must be marked and note the available flat or curved surface. | Choose a marking window that fits the complete layout with enough room for positioning. Check the head’s contact feet or locating accessories for the part shape. | A handheld unit still has a defined marking window; a larger layout may require repositioning or a different setup. |
| Material and hardness | Identify the material, coating, surface finish, and approximate hardness of the parts. | Request a sample test using representative parts. Verify mark contrast, legibility, and permanence rather than relying only on a material list. | Dot peen creates indentations with a pin, and the result can vary with material hardness, coatings, and surface preparation. |
| Required mark depth | Establish whether a light identification mark or a deeper, more durable mark is needed. | Tell the supplier the required depth and any inspection method. Validate depth on the actual material and part geometry. | Mark depth is affected by the machine settings, pin, material, and surface; it should be verified by testing. |
| Code readability | Specify any barcode or 2D-code format, minimum dimensions, and scanning distance or inspection conditions. | Test marked codes with the scanner and verification process used in production. Allow adequate space around the code. | A code that appears visible may not scan reliably if its size, dot spacing, contrast, or surface curvature is unsuitable. |
| Part size and access | Consider part weight, shape, mounting position, and access to the marking location. | Check the complete handheld assembly, cable routing, handle position, and operator reach on the real part or a representative fixture. | Ease of positioning affects consistency, cycle time, and operator fatigue. |
| Power and mobility | Determine whether the work is performed at a fixed station or across multiple locations, and whether mains power is available. | For mobile work, confirm the power arrangement, battery runtime if applicable, charging needs, and availability of replacement batteries. | Portability depends on the full system, including the marking head, controller, power source, and accessories. |
| Production volume | Estimate marks per shift, required cycle time, and how frequently jobs or marking layouts change. | Run a timed trial with typical content and parts. Include loading, positioning, data entry, and inspection in the cycle-time estimate. | Marking speed alone does not represent total throughput; handling and setup can take significant time. |
| Operating environment | Assess dust, moisture, temperature, vibration, lighting, and exposure to oils or other contaminants. | Check the documented environmental limits for the complete system. Plan suitable storage, cleaning, and protection for the controller and cables. | Environmental suitability varies by model and component; do not assume a handheld machine is weatherproof or dustproof. |
| Operator and safety needs | Review training, ergonomics, noise exposure, eye protection, and safe handling requirements. | Evaluate the tool in the intended working posture and follow the manufacturer’s instructions and applicable workplace safety rules. | Repeated handheld operation and impact marking require appropriate work practices and risk assessment. |
| Data and traceability | Check whether marks must use sequential numbers, imported production data, or records linked to a production system. | Confirm supported data-entry and connection options, and test the complete data workflow before deployment. | Reliable traceability depends on correct data transfer and verification as well as the marking process. |
| Maintenance and support | Ask about pin replacement, routine cleaning, service intervals, spare parts, and technical support. | Review maintenance instructions and identify who will perform routine checks. Confirm access to suitable consumables and service. | Regular care and timely replacement of worn parts help maintain consistent marking quality. |
Related Posts
-
2026 Top Handheld Dot Peen Marking Machine Buying Guide
-
Top 10 Handheld Dot Peen Marking Machines from Chinese Manufacturers at the 137th Canton Fair
-

China Manufacturing Thrives Amidst US China Tariff Challenges with Best Dot Peen Machine
-
How to Choose the Best Dot Peen Machine for Your Needs?
-

2026 How to Choose the Right Dot Peen Marking Machine for Your Business?
-

Essential Guide to Choosing the Right Handheld Dot Peen Marking Machine for Your Needs